Guide for using the Desktop Execution Trace Toolkit
08 June 2021 by Chris Woodhams
Introduction
The Desktop Execution Trace Toolkit (DETT) is a really valuable tool for tracking down performance issues and identifying specific VIs or functions that are contributing. The User Interface (UI) of the DETT gives you lots of options, but ultimately the view that gives you the summary of the activity relating to your application is the table on the Home tab. Each row in the table represents an execution event occurring in one of the VIs in your application, there is information such as the type of event, the time the event occurs and the VI in which it occurs. When writing this post I did some research and realised that because of our awesome community there is lots of info out there on this!
Use Case
We have been working on a project in which we inherited some source code with no scope to rewrite and we had implemented some modules to manage some of the data acquisition. These modules were communicating with the UI module via queues and there were some existing queues and other functionality in the application for executing tests and managing configuration parameters. We had a performance issue, when you run the application you could do everything you would expect to be able to do, but over time, the application would become less responsive and eventually stop functioning, it froze. We turned to the DETT!
Getting Started
I sometimes find getting started the hardest bit and I had a couple of blips when setting up, so I thought it would be useful to walk through the first few steps.
- You need to install the DETT as it doesn't automatically install with LabVIEW. You can download it from here, make sure you get the right version for the version of LabVIEW you are running, check this here.
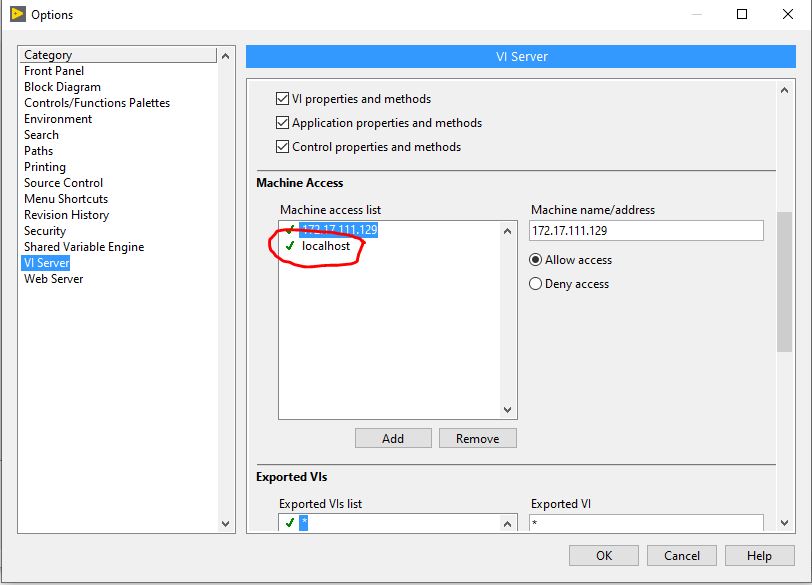
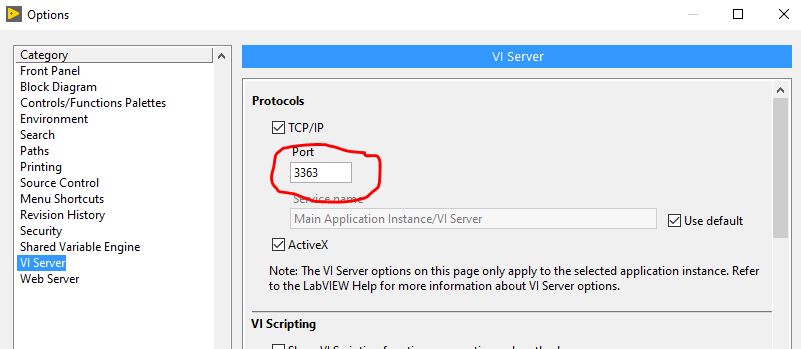
- You need to ensure that your VI Server configuration is set up to enable the DETT to talk to LabVIEW, this is simply a case of ensuring you have localhost in the Machine Access list of the VI Server options. In LabVIEW, go to Tools -> Options and select VI Server on the left hand side. Scroll down on the right hand side until you see the Machine Access list and add localhost if it is not already there. Whilst you are in these options, check the TCP\IP port that is configured at the top of the VI Server section.
- Back to your project, open the VI you want to analyse and run it.
- In the DETT, in the Home tab set the port number and make sure you hit the refresh button.
- Select your project from the Application Instance drop down list.
- In the View tab you can filter what is visible in the table, do this if you wish.
- In the Data tab you can turn on logging if necessary, settings for this are pretty self explanatory.
- Hit the green start button and debug away!
Other Resources
As I said earlier, there are other snippets and useful resources to read about on this subject.
We would love to hear from anyone that has got some value out of any of these tools, including DETT and if you think you could talk about it for 30 minutes, we can talk MLUG!
Back to Blog listings